CC2652RB development stick
what's so cool about it..
- super tiny CC2652RB multiprotocol 2.4 GHz development stick
- Ideal as ZigBee coordinator/router
- .. as an OpenThread border router
- .. Matter compatible!!
- Low power capable for building battery powered devices
- Plug & Play, comes pre-flashed
- Deadly easy programming, thanks to the automatic-bootloader thing! ;)
- Made with here in Cologne
projects realized..
The Stick
Get one
international DHL prices literally exploded..
- we are currently searching for alternatives
- if you are intereseted in buying but the shipping is too crazy, just join the list and we will notify you!
We are in stock!
- Usually shipps within few day(s)
- .. from within Europe, Germany, Cologne!
- Pin-Headers are ONLY needed if you want to develop custom-firmware!
- USB extension cable (20cm) is highly RECOMMENDED
* taxes may apply
* shipping-fees will apply
* both get calculated once you enter your address!
We accept a ton of payment-methods. But if you prefer something else or it isn't working, just use the "Pay later"-method. You will get an email afterwards, with additional options like bank transfer..
Resellers
Or choose one of our Resellers in your country:
 USA
USA
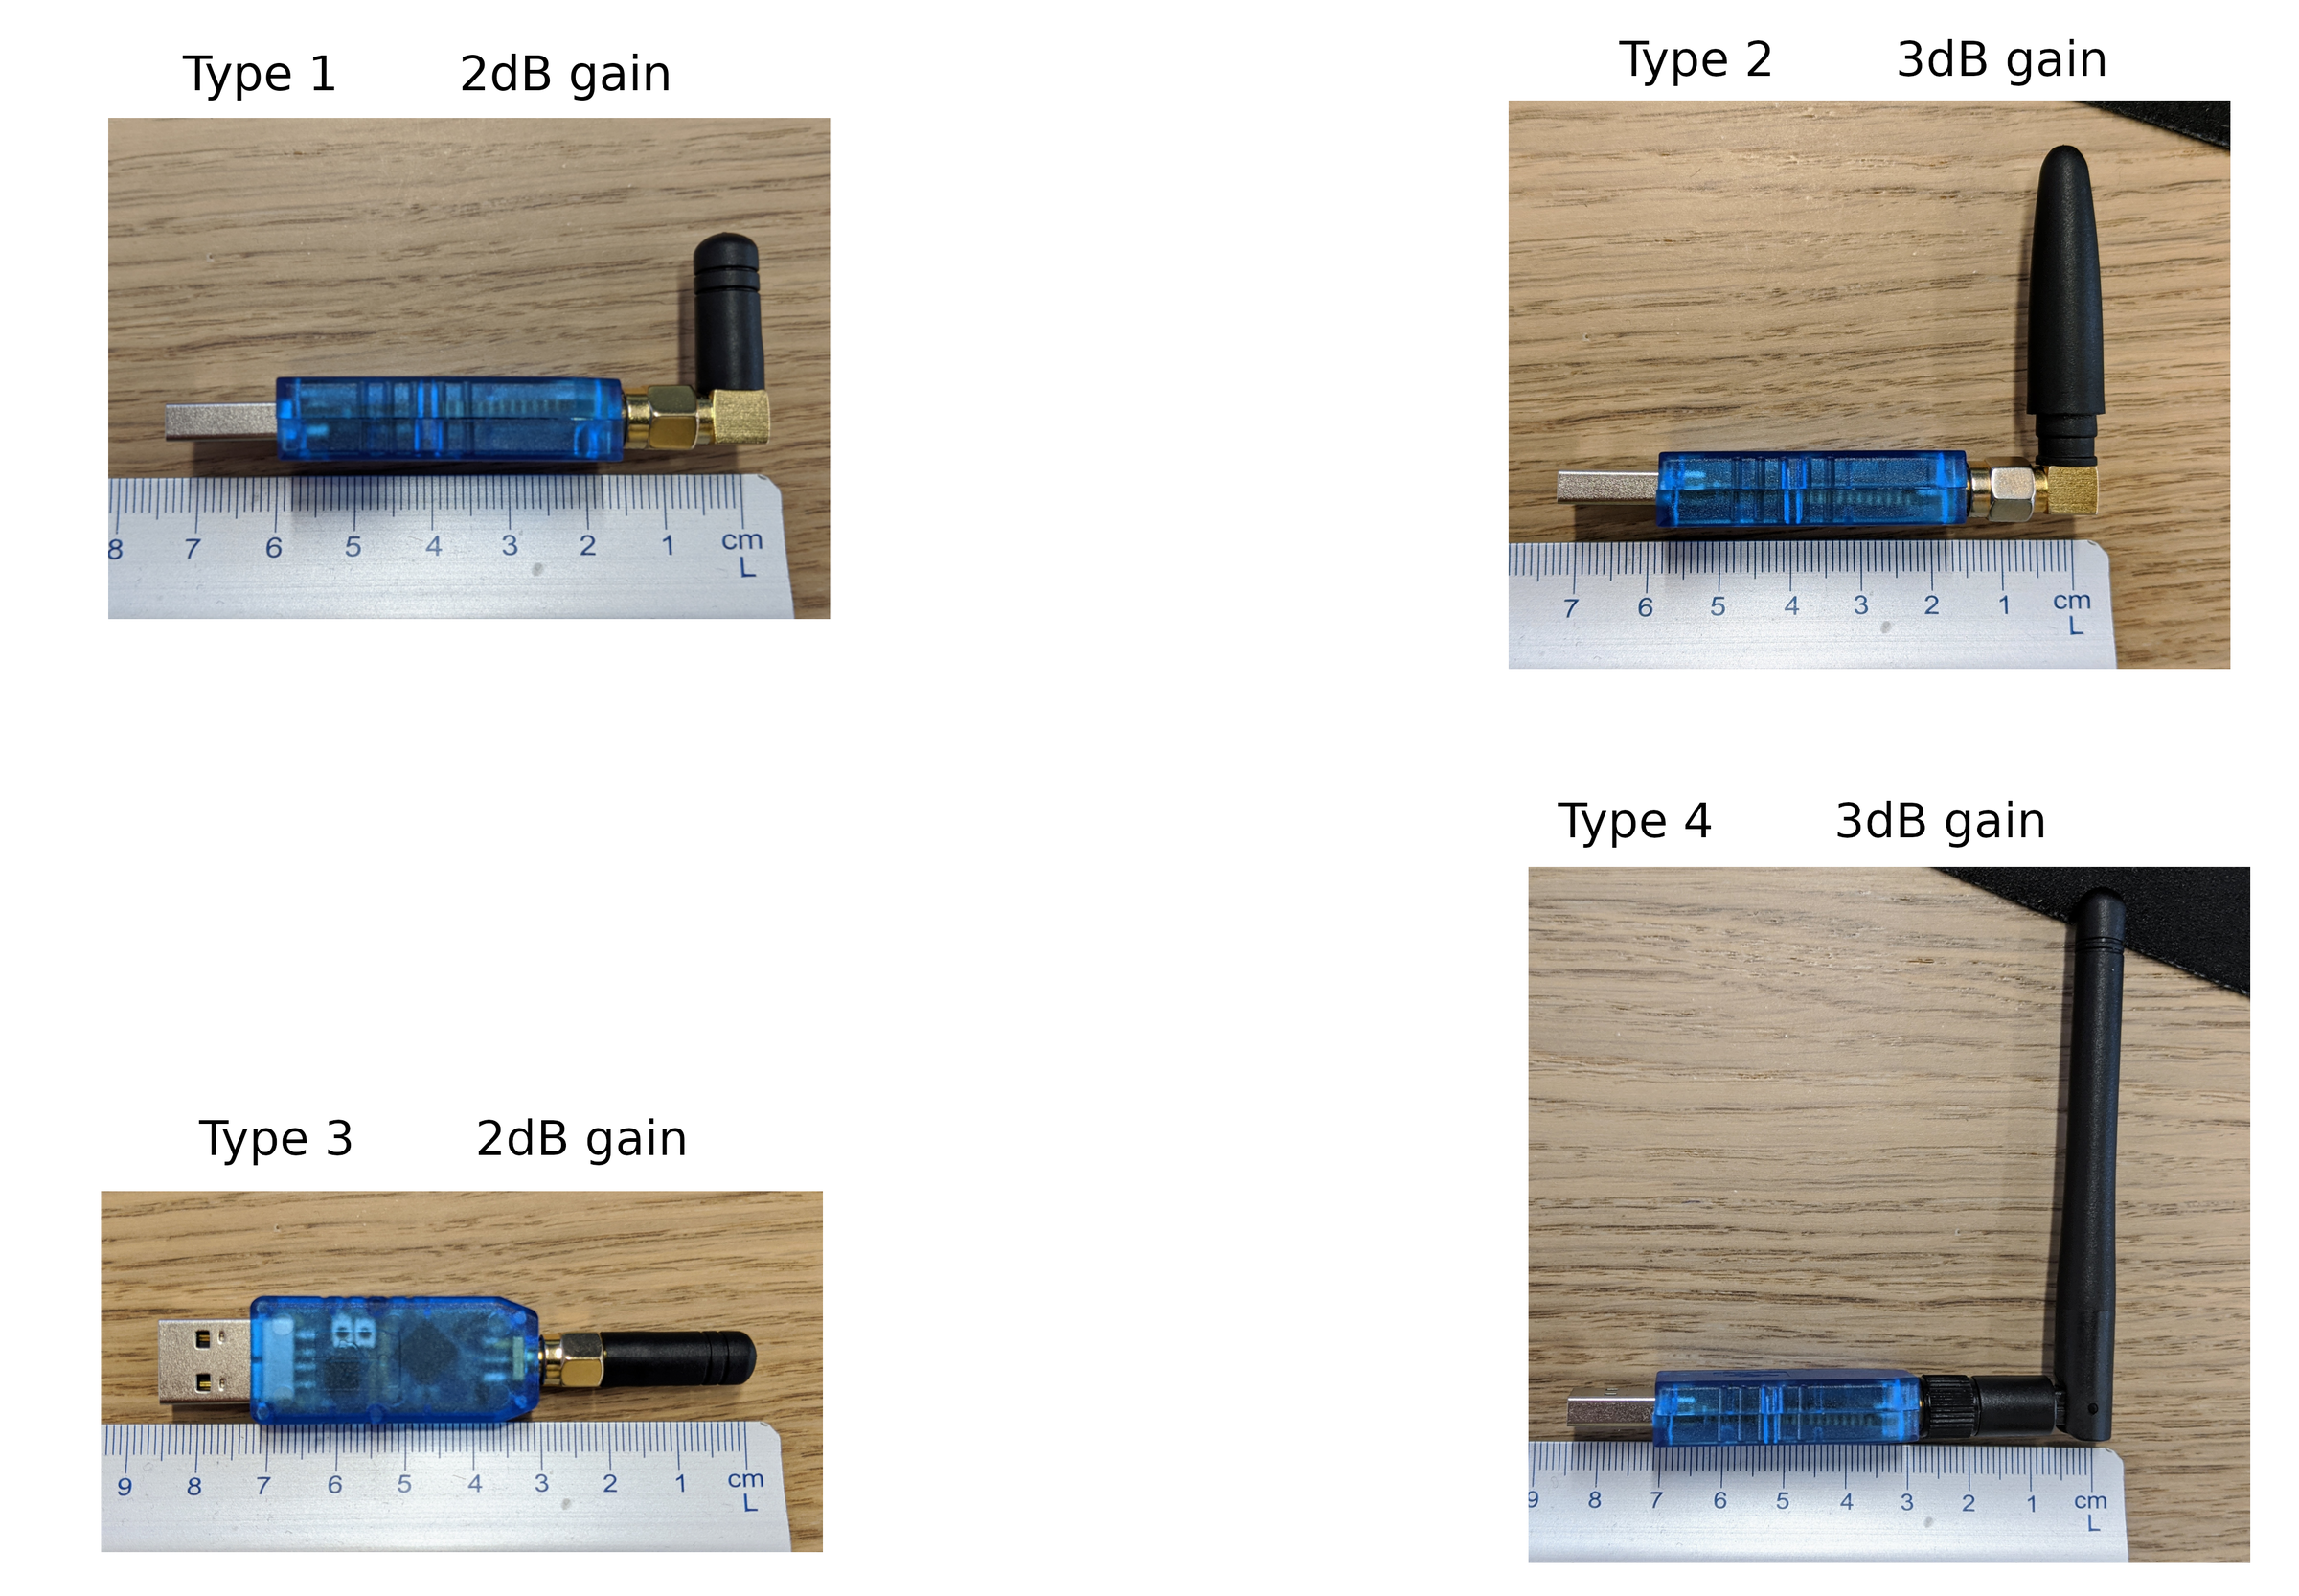
Antenna types
Dimensions
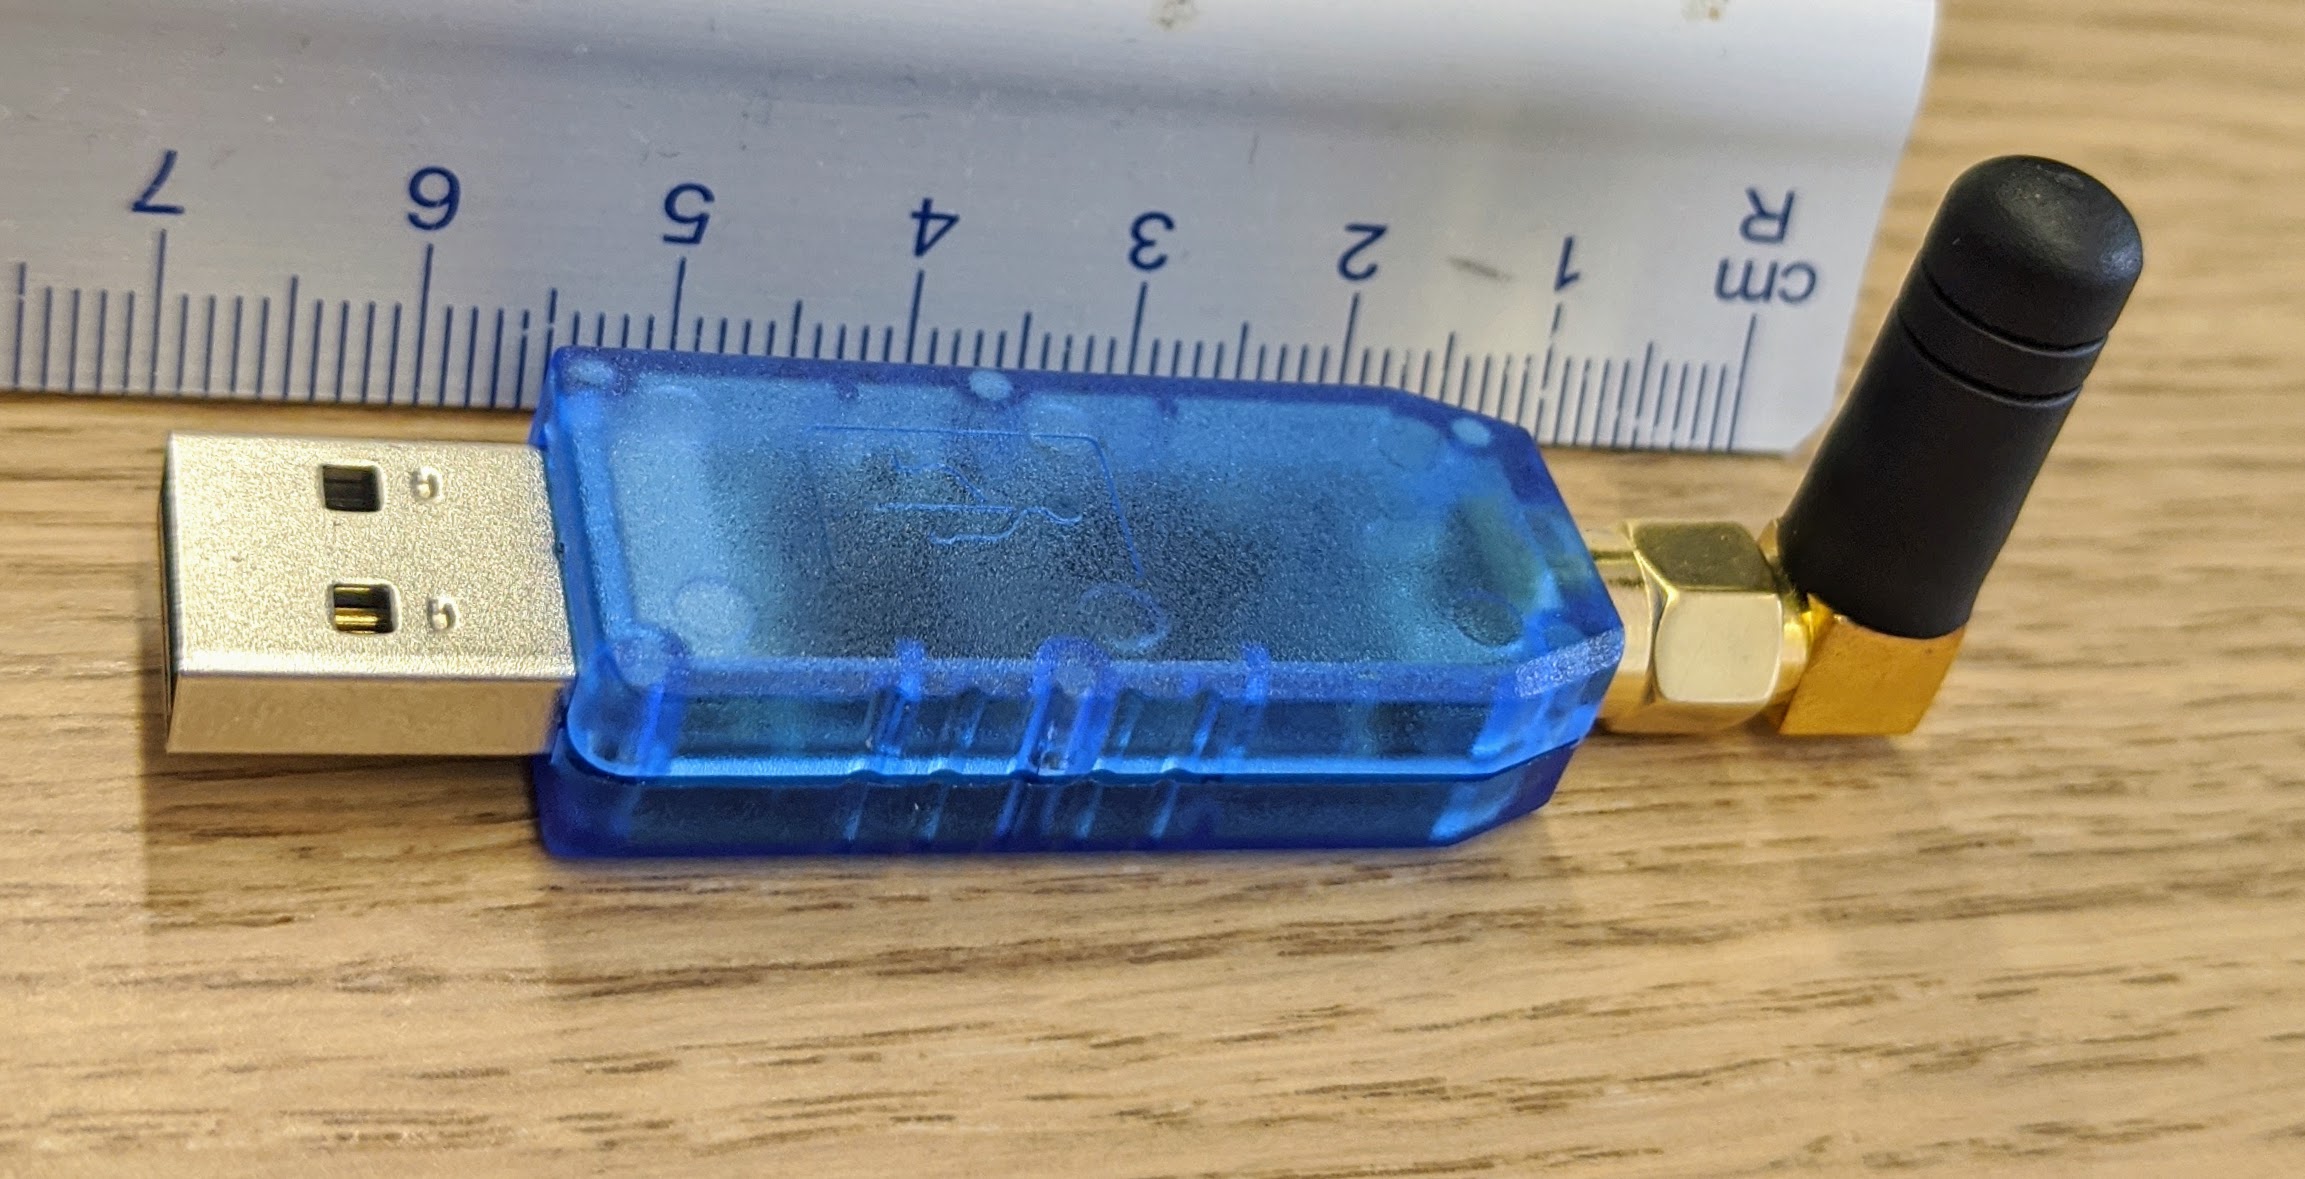
Fully assembled with the smallest antenna its around 7cm longs.
The whole stick itself measures around 50x14mm.
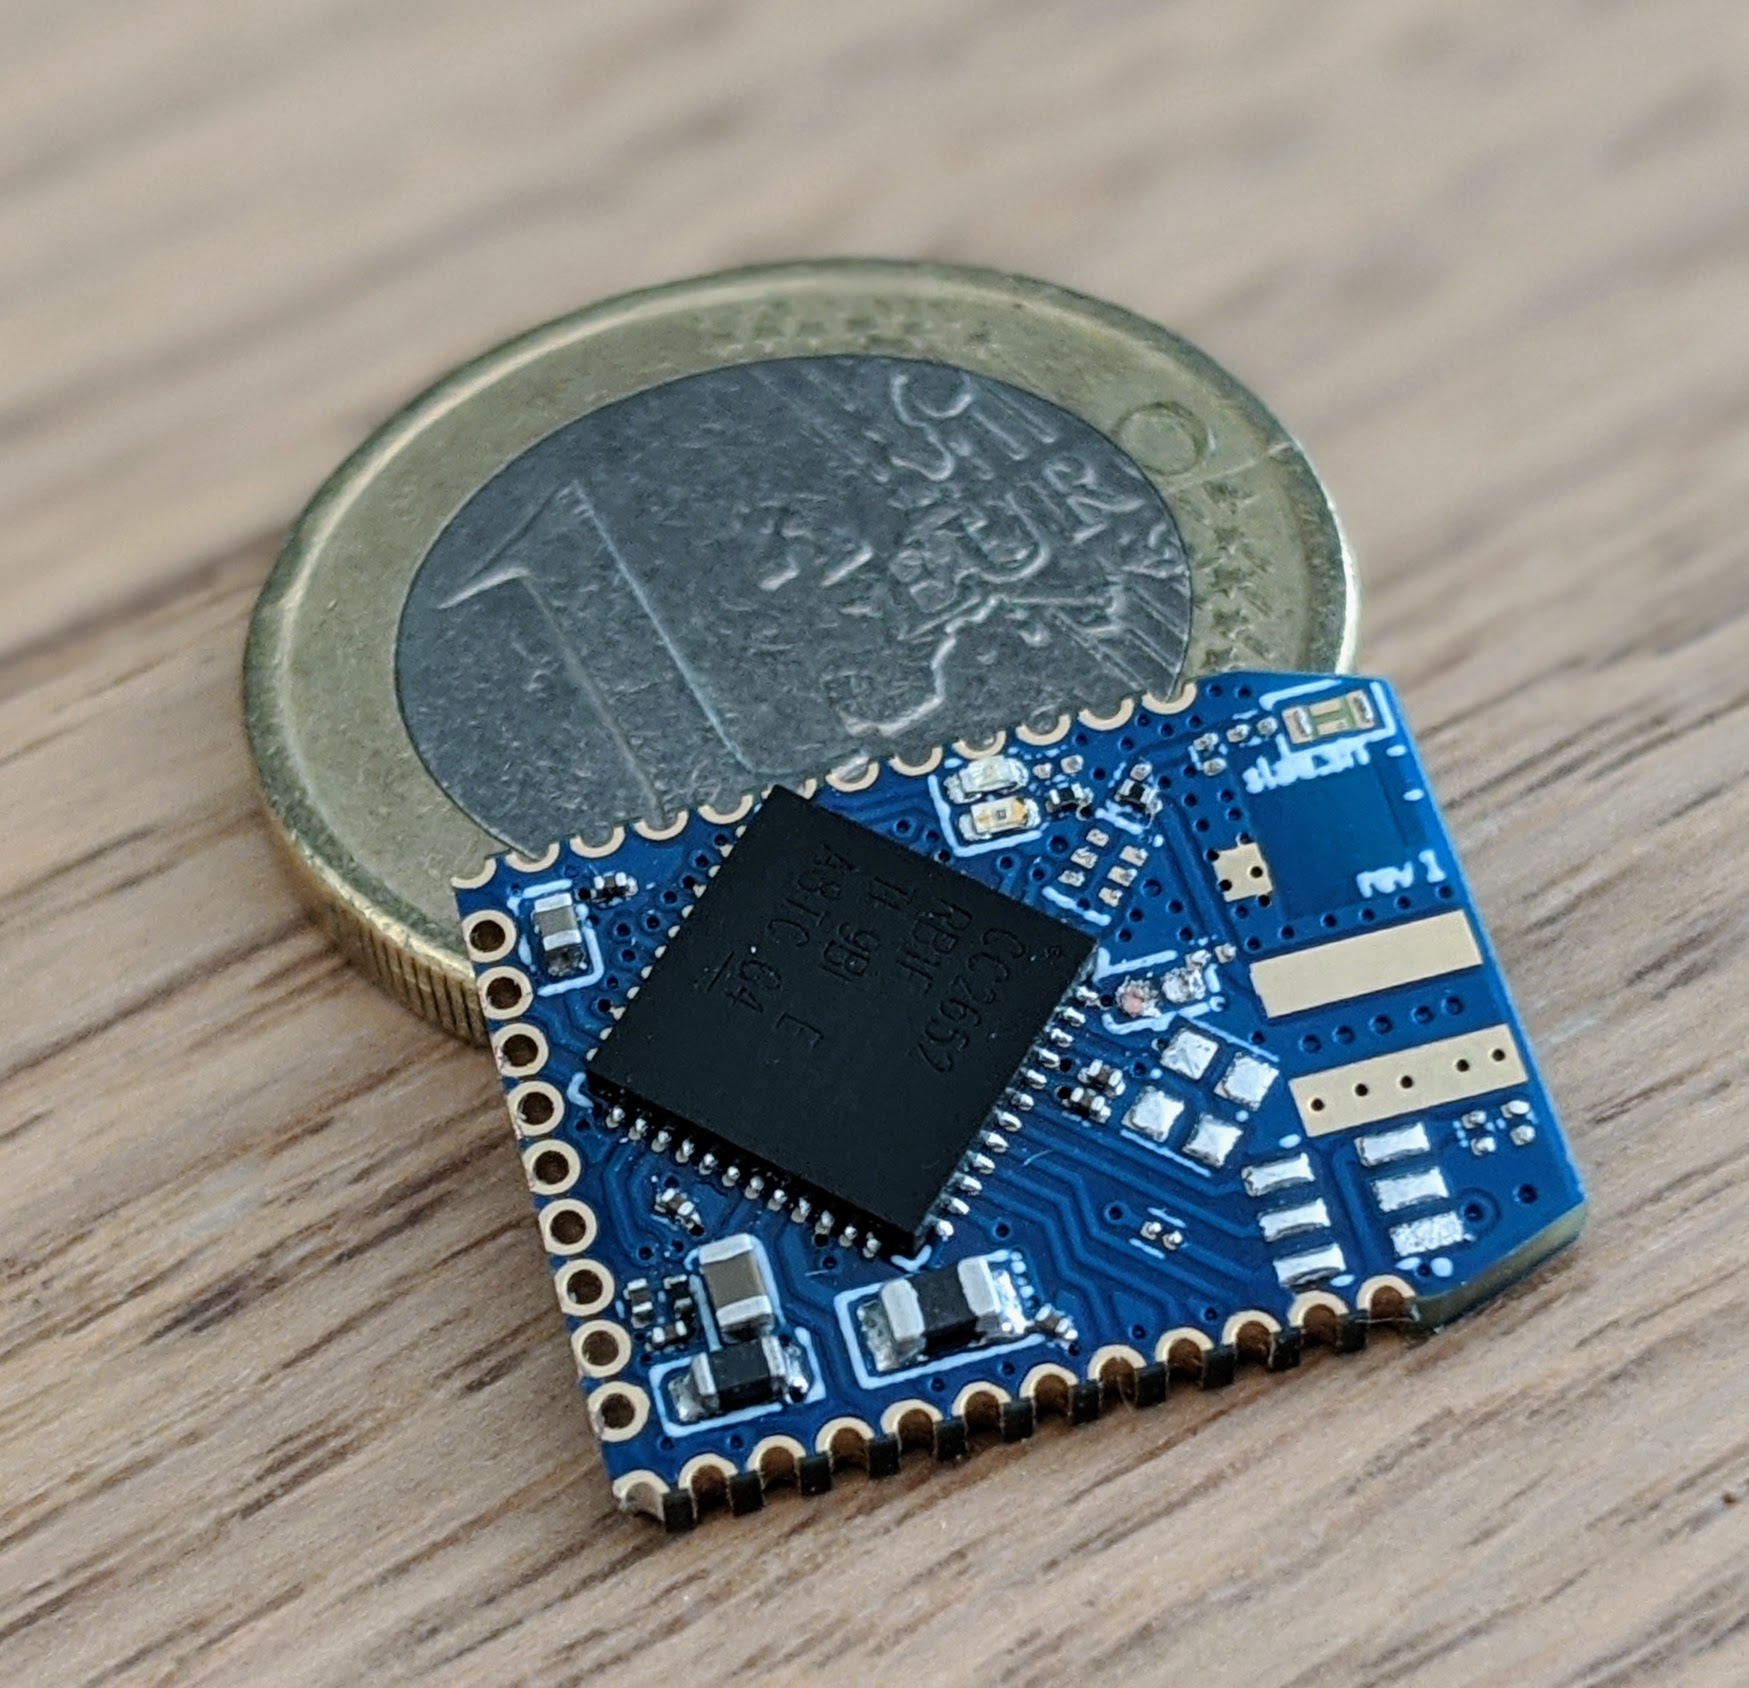
The CC2652RB breakout part will be around 18x14mm.
It's smaller than a CR2032 coin cell! And can easily powered by one for multiple years :fontawesome-regular-grin-hearts:
Pinout
Nearly all free usable pins of the CC2652R are accessable through the pin-headers.

2x12 and 1x9 1.27mm pin-headers
LEDs
- Blue: general purpose (GPIO6)
- Orange: general purpose (GPIO7)
- Green: power LED (3V3)
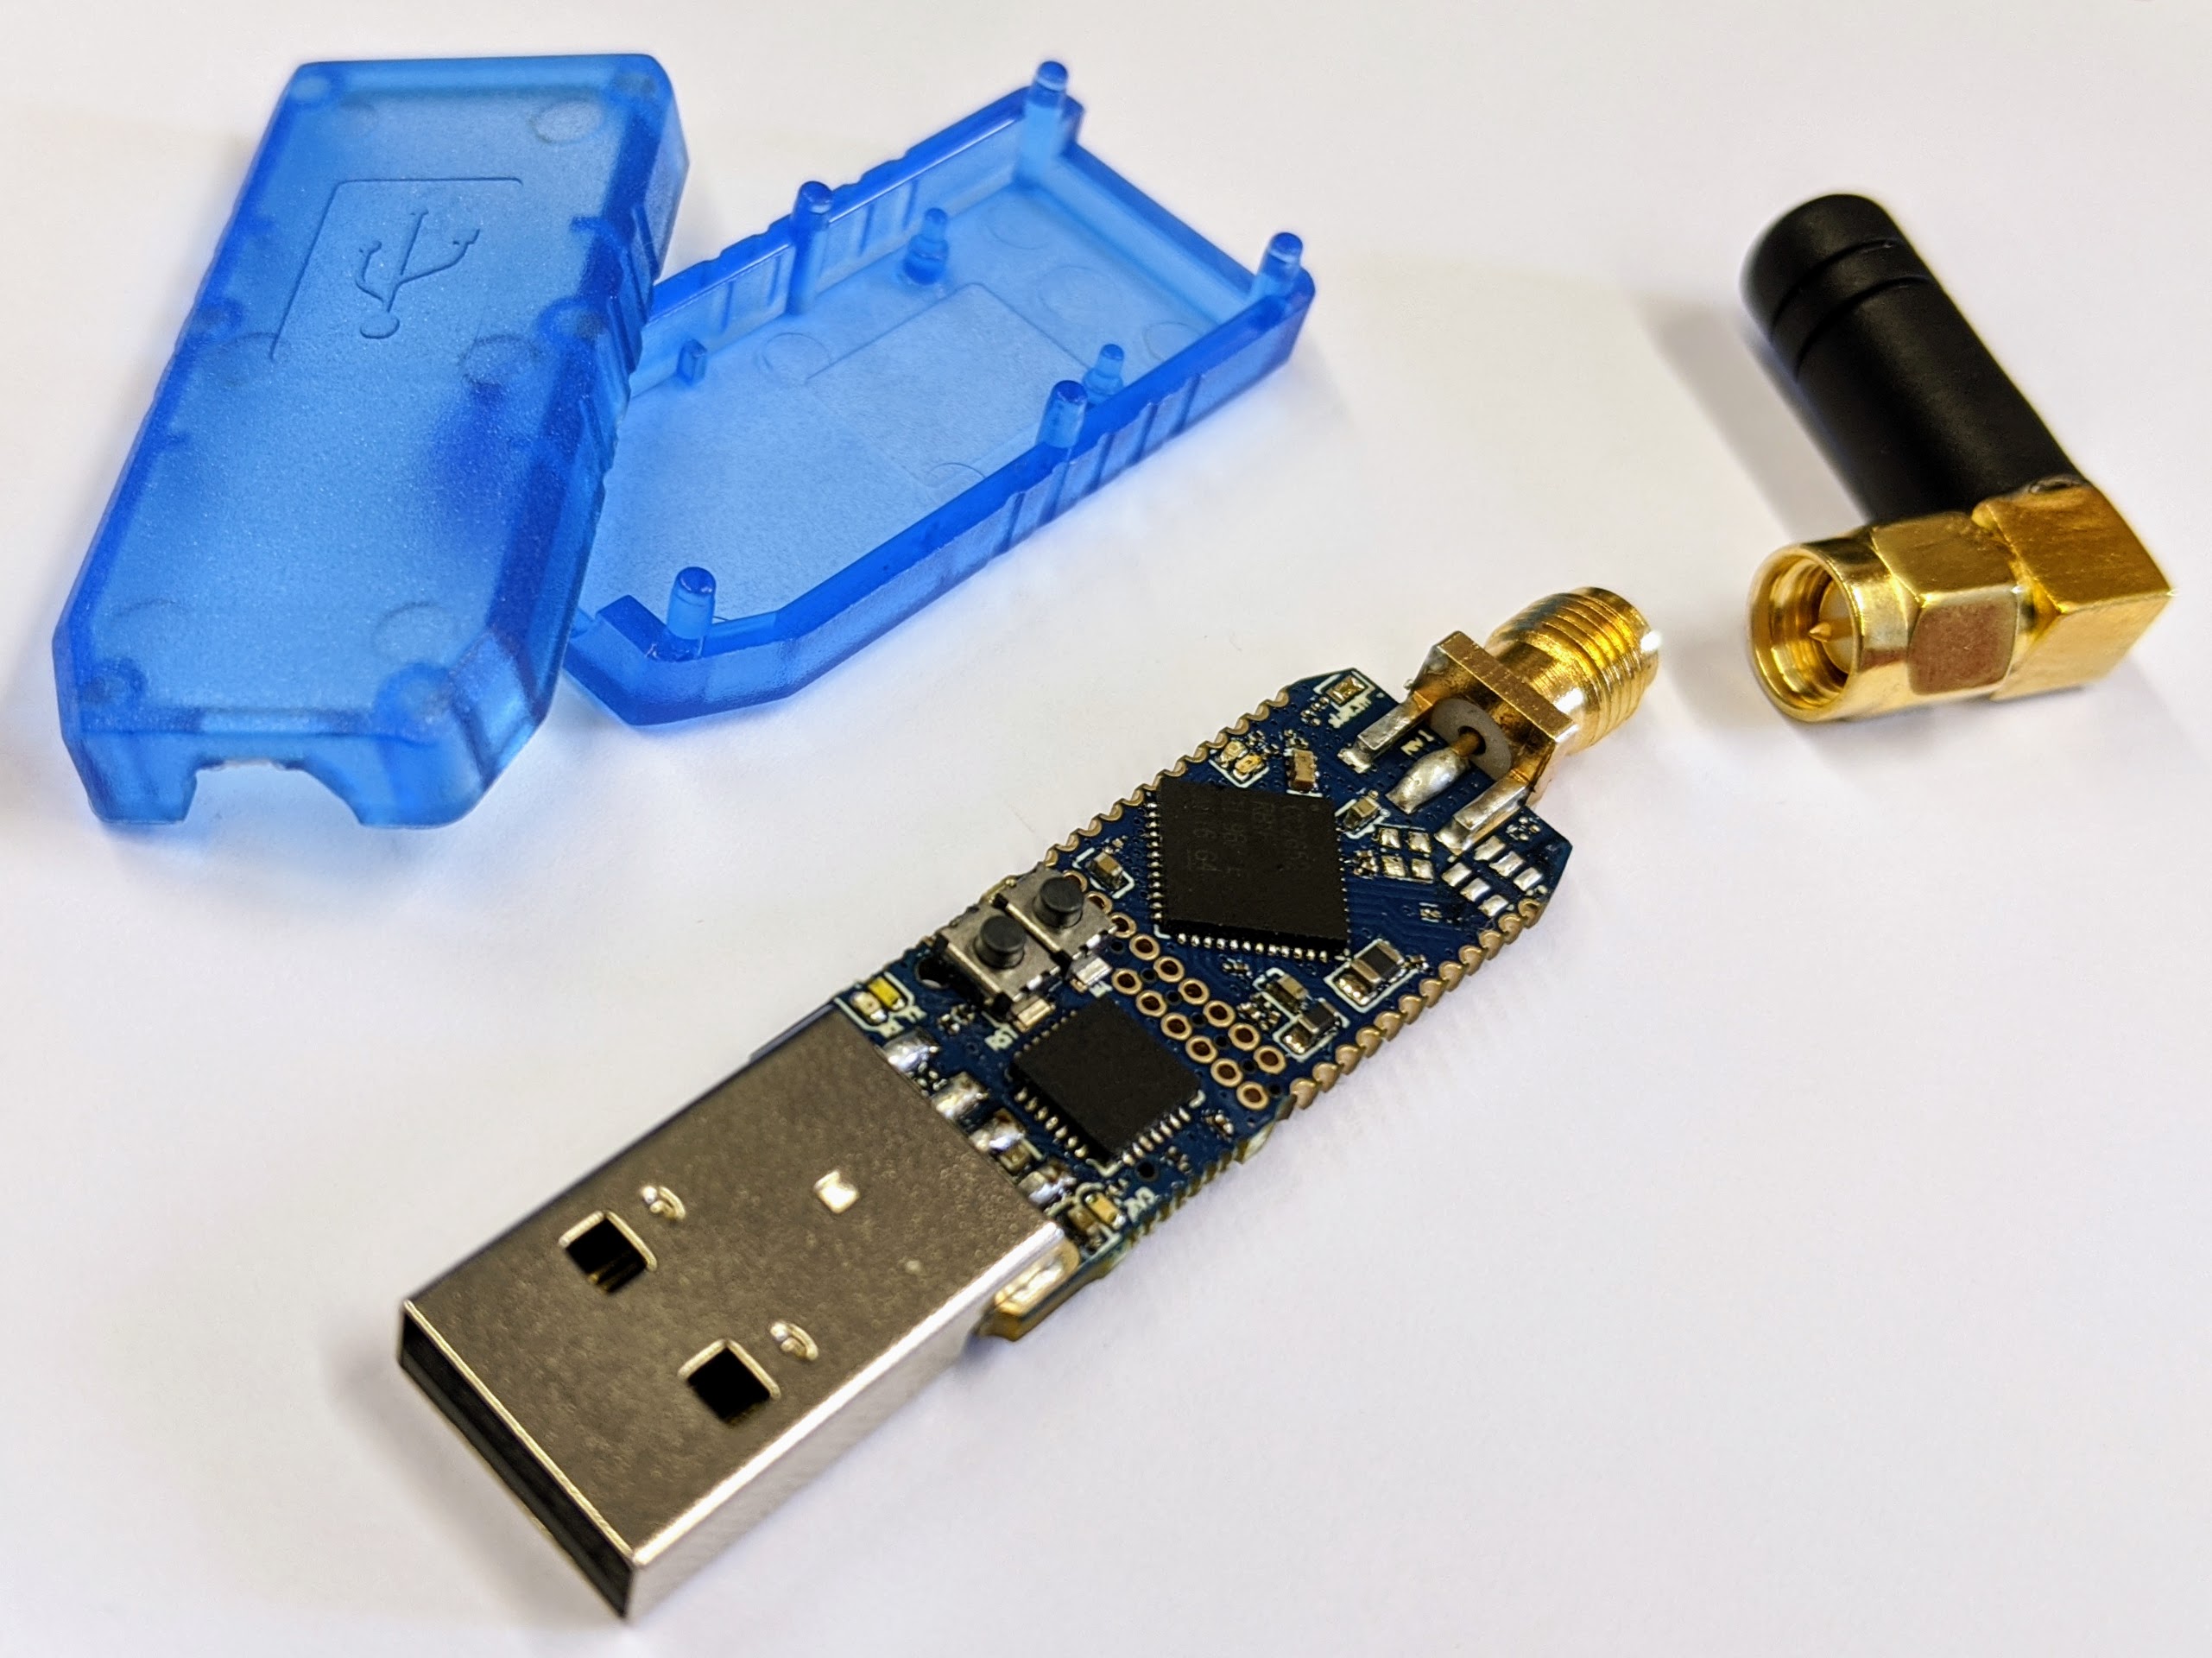
Antenna
It can be shipped in two antenna-options:
- SMA-connector (female, whole) -> so you can use any SMA (male, pin) antenna!
- on-chip antenna
ZigBee coordinator
Hint
Now officially listed on https://www.zigbee2mqtt.io/information/supported_adapters.html#slaeshs-cc2652rb-stick
It's easy to use with the popular zigbee2mqtt project from koenkk!
Many thanks to him and his awesome work! :fontawesome-regular-grin-hearts:
After getting my fixed costs, we will reward him with every sold ZigBee-stick!
Info
You can just replace your less powerfull CC2531/CC2538 or what ever stick you used before..
.. with this new powerfull CC2652R device!
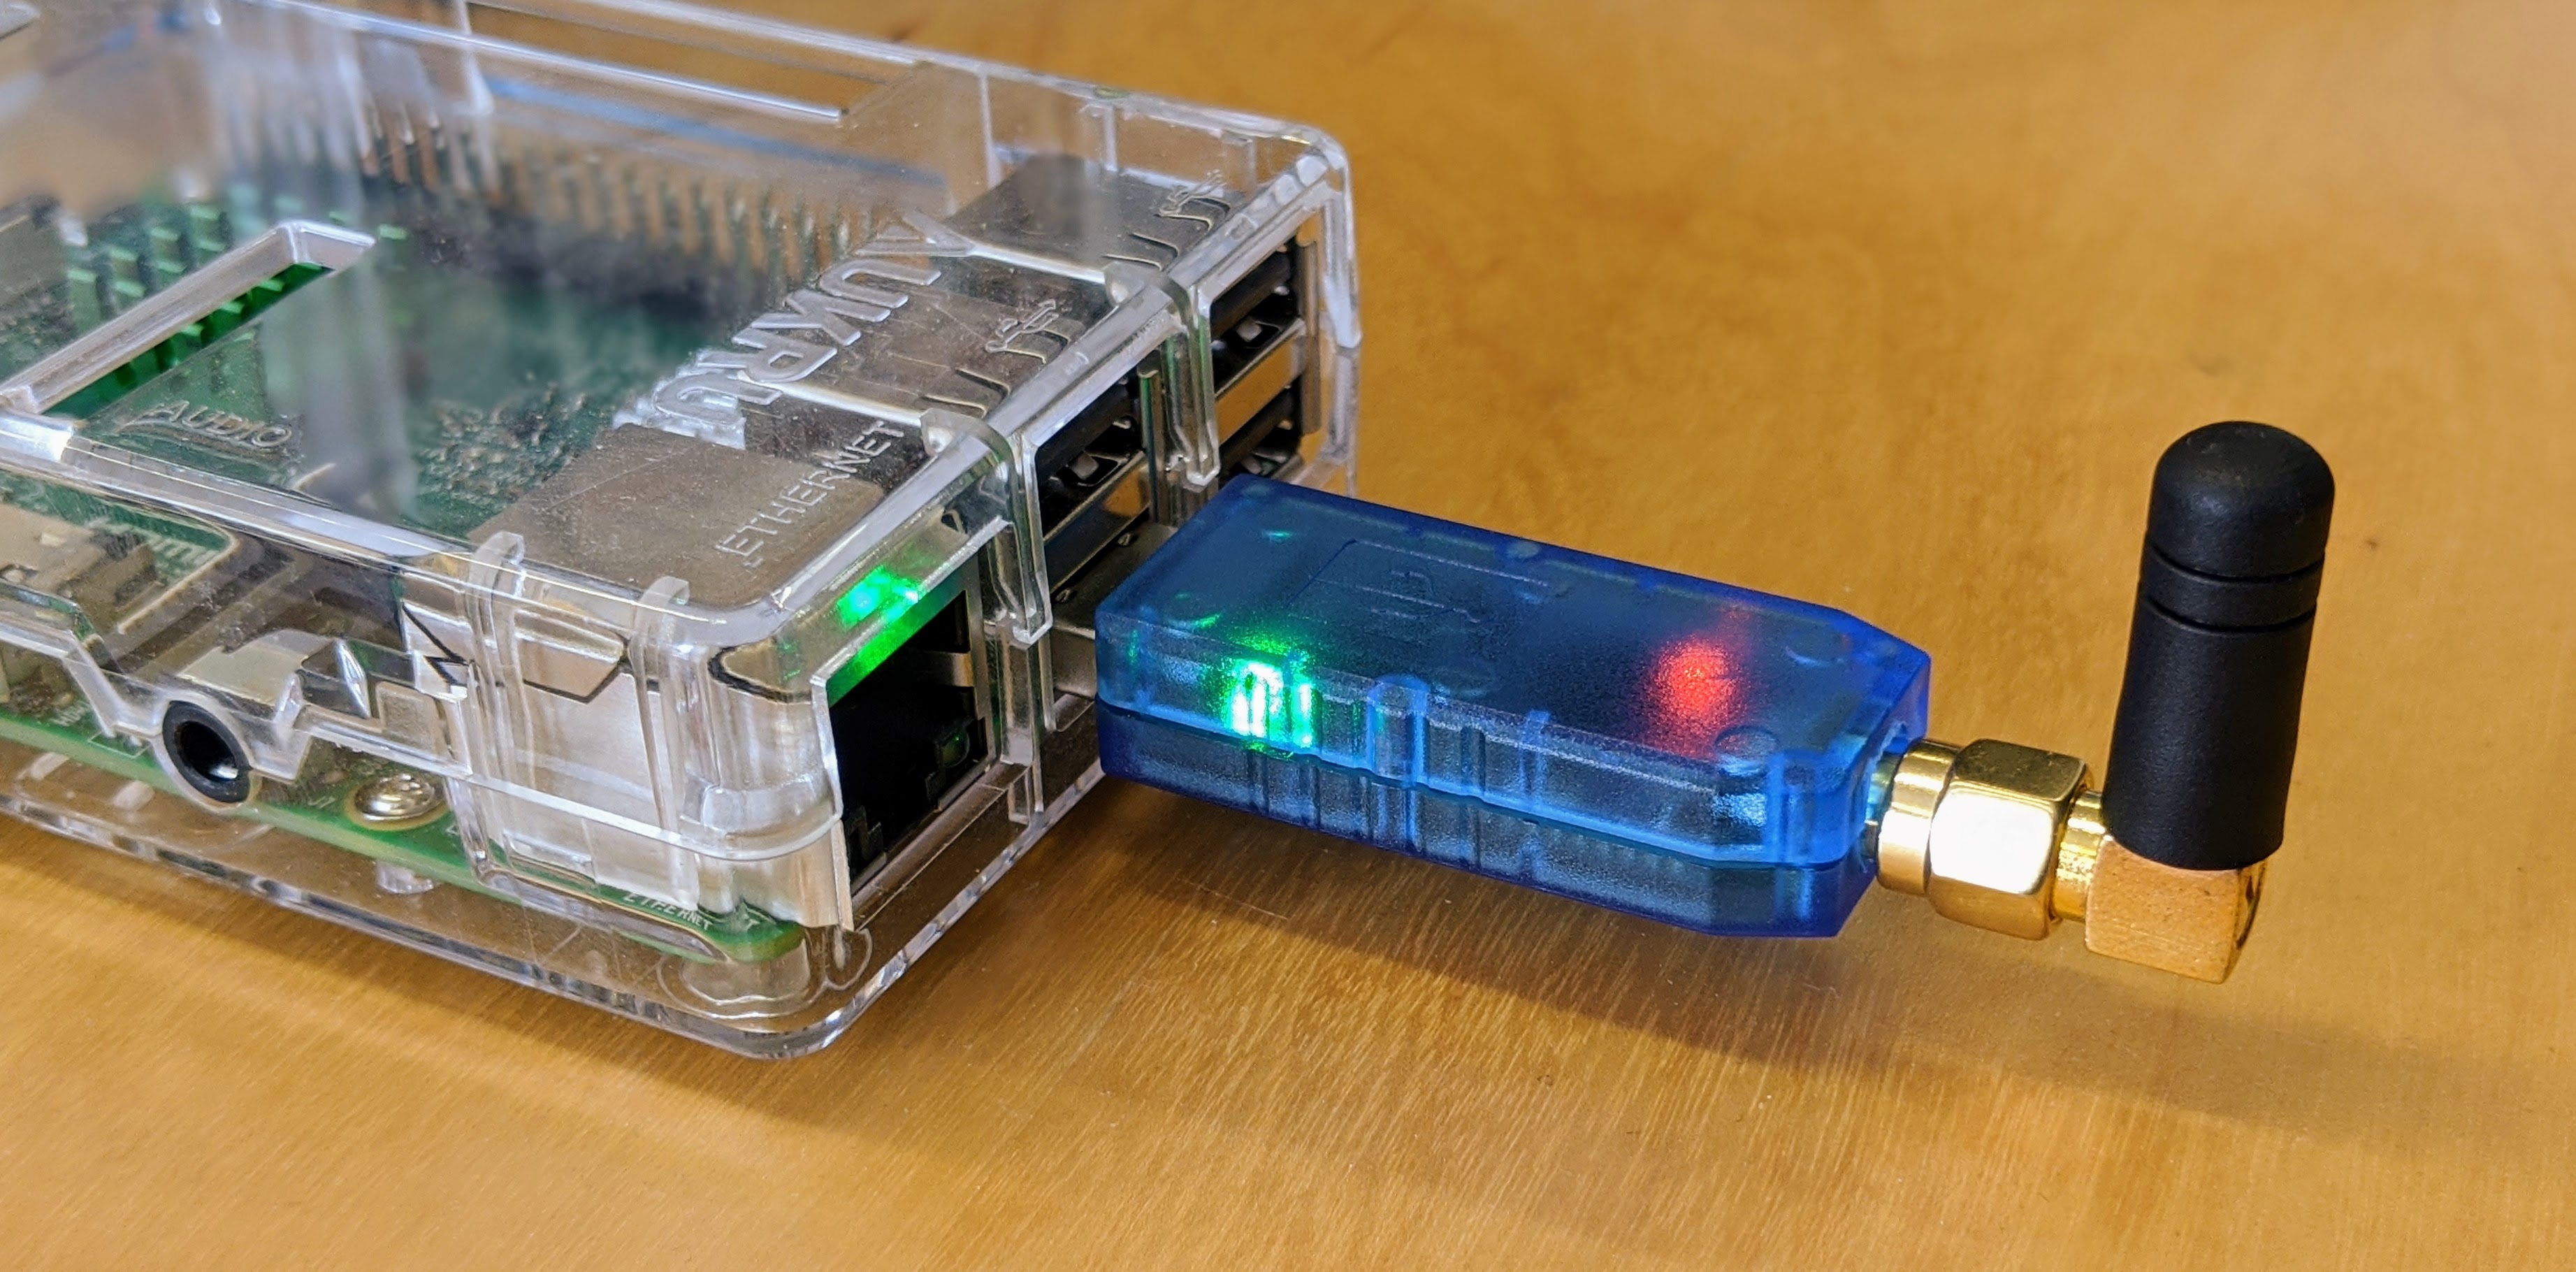
Warning
For the images the stick is plugged into the PC/Pi directly to show its dimensions. Better DO NOT do it like this, use a USB-Extension cable instead!!
See further explanation here.
Installation
Firmware
Download
If you already ordered it with the correct firmware, skip this and continue here.
Download the correct FW, using the z-stack firmware 3.x.0:
from koenkk
COORDINATOR
https://github.com/Koenkk/Z-Stack-firmware/tree/master/coordinator/Z-Stack_3.x.0/bin
ROUTER
https://github.com/Koenkk/Z-Stack-firmware/tree/master/router/Z-Stack_3.x.0/bin
In both cases, we will need the CC2652 **RB file.**
Download and extract.
from me
This is JUST for debugging purposes.. do not run this firmware in a productive environment. it does not get updated!
Download this firmware file znp_CC2652RB_20200715.bin.
Main difference to koenkk's version:
- LED's (blue and orange) are turned ON at startup.
- the orange one will blink on each received UART character.
Flash
Use this guide below.
zigbee2mqtt
![]()
Just start it as usual. See the following documentation: https://www.zigbee2mqtt.io/#getting-started
Warning
We need at least version 1.14.2!
Warning
Check this guide for switching from one to another coordinator.
Homeassistant / Hass.io
There is this super cool hassio add-on from danielwelch!
Which let's us use the zigbee2mqtt as an easy to use add-on.
Here is a really good installation guide.
Warning
As described above, we need to take care to use at least version 1.14.2 of koenkk's zigbee2mqtt!
Hint
Do not use /dev/ttyACMx. This will use different linux-drivers..
Warning
Another thing we need to take care of, is to use the "long" serial-port names!
Do NOT use the syntax like /dev/ttyUSBx.
Instead use the one like /dev/serial/by-id/usb-Silicon_Labs_slae.sh_cc2652rb_stick_-_slaesh_s_iot_stuff_00_12_4B_00_21_A8_E3_95-if00-port0!
Why should we do this?
Cause the serial-port using the enumerated-syntax can (and may will) change!
Using the /dev/serial/by-id/.... syntax will never change.
And docker, or the running linux, will find the correct associated serial-port for our device! ;)
How can we check the correct name?
Go to the Hass.io/Supervisor-tab, go to System and click on the Hardware-button.
And please do this for all other USB-devices you are using, even in other add-on's. :)
nymea

Just stumbled across this cool project: https://nymea.io.
It offers good ZigBee support and is actively developed/tested using our stick.
The docs are great and there are many other protocols supported of course too!
Super easy extendable through a well developed plugin system. A joy for you devs out there..
Its definitely worth a try!
Matter support!
Matter uses OpenThread for its underlying protocol.
So you are good to go to conenct your new Matter devices via our stick. :)
There are two options how to build an border router.
- NCP
- RCP
See firmware downloads below..
OpenThread border router
![]()
You can also easily use it as a OpenThread border router!
Together with the use of wpantund you can control and publish your local OpenThread network.
wpantund will connect to the stick flashed with the OpenThread border router FW and will create a local network interface! this can then easily be used to communicate to OpenThread devices simply by using their IPv6 addresses :fontawesome-regular-grin-hearts:
Firmware
Just flash one of the following firmware files:
https://github.com/slaesh/cc2652-stick/tree/master/firmware-files/openthread
as described here.
Flashing
Warning
Every flash-process may brick your device. Chances are low, but there! :) So, only update if you face any issues or there are recommended updates. If everything is working smoothly.. There is no need to be up to date! Run updates on a "another" machine, do not use the "production environment".
There are multiple ways to flash:
- Using the ZigStart Multi Tool recommended
- JelmerT's serial bootload tool
- Using a JTAG-Adapter
Serial bootloader tool
automatic bootloader
You dont have to put the CC2652RB manually into the bootloader mode
Its done by the tool automatically!
So no need to reopen the enclosure for flashing..
Determine com-port
On windows, use this in a Powershell:
$comports = Get-WMIObject Win32_SerialPort; $comports | Get-PnpDeviceProperty -InstanceId {$_.pnpdeviceid} -Keyname DEVPKEY_Device_BusReportedDeviceDesc | ForEach-Object { foreach($comport in $comports) { if ($comport.pnpdeviceid -eq $_.instanceid) { new-object psobject -property @{COMPORT = $comport.deviceid; 'Device-Name' = $_.data} } } }
On linux, use this:
ls -l /dev/serial/by-id
flash it
- Install python
- Use
python --versionto be sure, that you are running python 3 or above! - If you are NOT running 3.4 or higher, you need to install
pip, too. - Install dependencies with
pip install pyserial intelhex - Download the cc2538-bsl.py file or just clone the repo.
git clone https://github.com/JelmerT/cc2538-bsl.git - Open the directory containing the python-script
- Open a command line there or just navigate into the folder
- Type in this command to flash your image to the stick:
./cc2538-bsl.py -p “comport” -evw “fw-file”
Info
-e will erase the chip
-w writes the file into flash
-v will verify the checksum
Development
This stick is a great starting point if you want to get in touch with the 2.4 GHz technologies:
- ZigBee
- OpenThread / Matter
- Bluetooth 5 (BLE)
- any custom RF protocol based on IEEE 802.15.4
You can get ready in just a few minutes and send your first packets through the air!! =)
.. and thats really satisfying ;D
Enviroment
There is at least one way to programm and debug the CC2652R devices:
- CCS - Code Composer Studio from TI
You can download the latest version here.
It shippes with so many example projects! For all possible protocols.
BOOTLOADER SETTINGS
TAKE CARE WHILE FLASHING!
To use the auto-bootloader and flashing via USB you need to take care that the embedded bootloader is enabled and the Backdoor-Pin is routed to GPIO-Pin 13 and active low !
Otherwise it's not possible to flash via USB!!

My blinky demo can be found here.
Trouble shooting
Checking the functionality and reading fw-version
You can now use this website: https://webserial.slae.sh
It only works with Chrome or Edge Browser! You need to STOP ANY PROGRAM USING THE SERIAL PORT !!
Or use this python script:
To test the stick just run this scipt: https://github.com/slaesh/cc2652-stick/tree/master/coordinator-test.
Maybe do it twice, if it fails the first time.
On linux the script may auto-detect the right comport! Otherwise, and on windows, you have to specify it!
zigbee2mqtt isn't working
koenkk and i needed to add some code to work properly, cause of the auto bootloader schematic.
So first of all, check which version of zigbee2mqtt you are running currently! See those hints.
If updating is not resolving your issue, please download this firmware for the stick.
And flash it using the guide above.
This FW is a coordinator, too. But will turn both LED's (blue and orange) ON at startup!
The orange one will blink everytime the stick receives any character via UART.
So we can use this for debug purposes:
- Plug the Stick -> LED's should be both ON!
- Start zigbee2mqtt
- If both LED's will turn off during starting zigbee2mqtt we don't have the correct version or some bad settings!
- Check your
configuration.yamlto NOT includertscts: truein theadvancedsection.
Still struggling? just get in touch with us via Telegram !!
can't get any serial debug messages
Your serial monitor need to release RTS and DTR.
Like on a unix-system, using miniterm:
miniterm.py /dev/ttyUSB1 230400 --rts 0 --dtr 0
Will open the ttyUSB1 with a baurdrate of 230400.
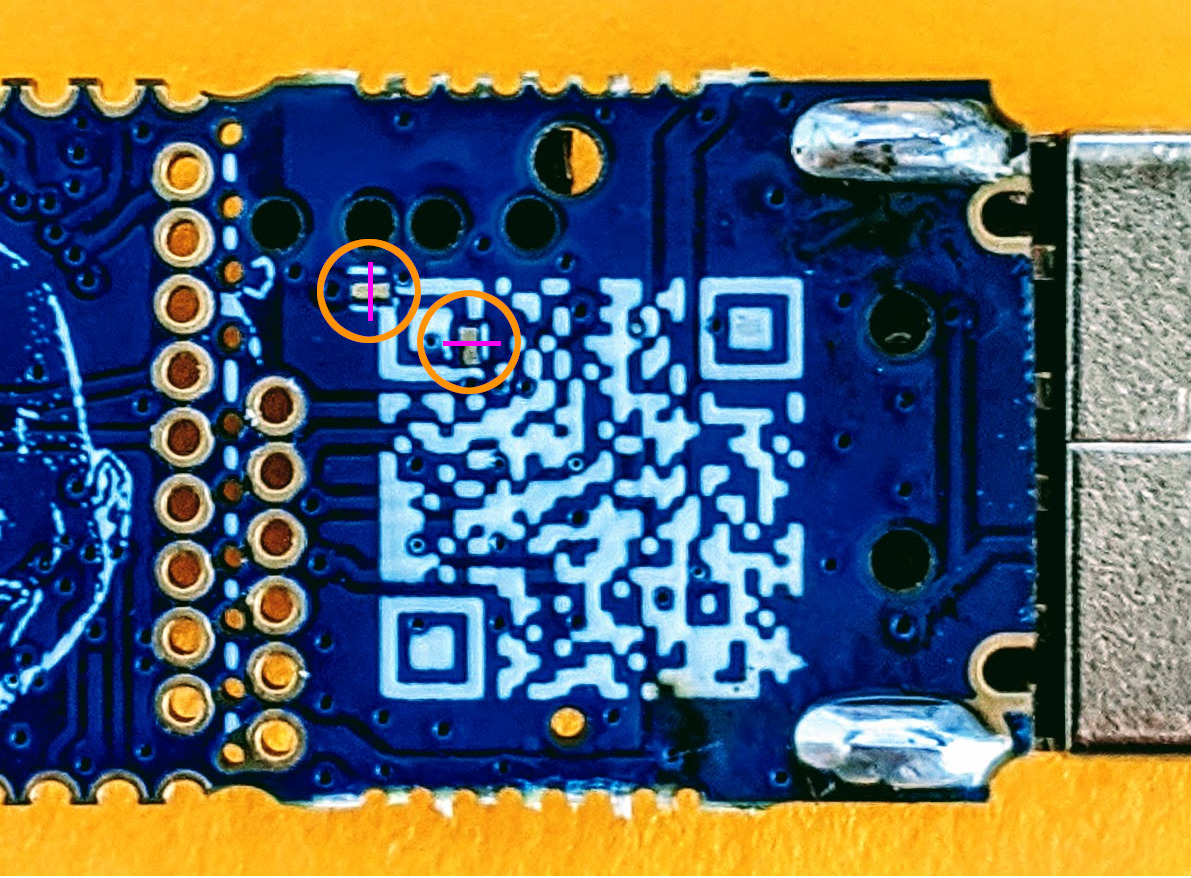
The RTS signal is connected to the RESET-Pin and DTR is connected to the Bootloader_Enable-Pin!
If you dont wan't this behavior, you can destroy/cut the solder-pads underneath..
HW files
https://easyeda.com/mxii.monxii/cc2652rb_minimalistic
Licenses
Hardware License: Solderpad 2.0
Software License: GPL v3
Documentation license: CC BY 4.0
Contact
Emails are hard to track and are getting messy real quickly..
So just text us on Telegram for any requests and technical support!